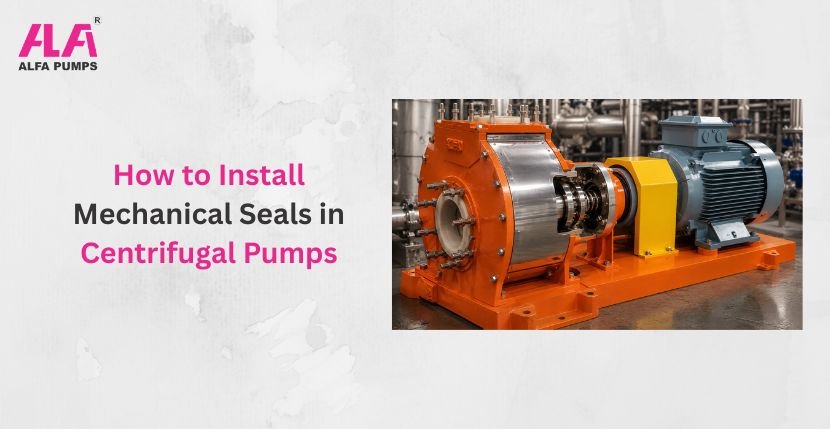
Seal leakage is a common problem in centrifugal pumps. Almost every maintenance engineer has faced it at some point. The mechanical seals looks like a small component, but it has one main job — stopping liquid from leaking out where the shaft meets the pump casing.
If installation is not done properly, expect the same problem to come back. Product loss, downtime, extra maintenance cost — all of this can be avoided with correct fitting.
This guide covers the correct installation steps in simple language, so anyone working on the shop floor can follow along easily. The process is mostly the same for metallic and non-metallic centrifugal pumps, including Alfa Pumps models. Non-metallic pumps need a little extra attention in certain steps, which we will point out along the way.
Standard chemical process pump ranges built to ISO and ANSI specifications are just as sensitive to seal-fitting errors, so the steps below apply whether you’re servicing a compact unit or a heavy-duty process pump.
Understanding Mechanical Seals and Why Proper Installation Matters:
A mechanical seal has two flat faces. One is the rotating face, fixed on the shaft. Other is the stationary seat, fixed on the pump body. Both faces press against each other tightly, so liquid does not leak out. In between, there is a very thin liquid film. This film reduces friction and controls heat.
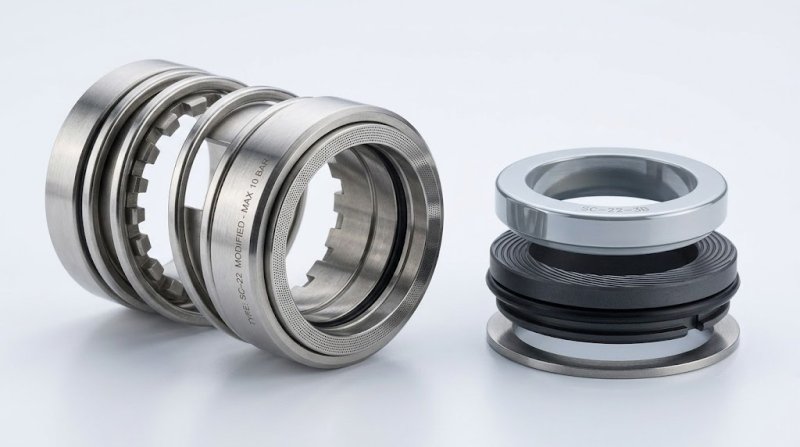
Most seal failures happen because of wrong fitting only. Even small tilt in the seat, or one scratch on the face, and seal will start leaking in just few days. Seal sits inside seal chamber. If there is dirt inside, or seat is not aligned properly, or handling is careless during fitting — pump life will reduce and it can also become safety issue in plant.
Some plants avoid this seal-maintenance cycle altogether by switching to magnetically coupled, sealless pump designs for their most hazardous transfer lines.
Pre-Installation Checklist and Safety Protocols:
Before you open up the pump, safety comes first. Skipping this step is where most accidents happen.
- Follow proper lockout/tagout (LOTO) procedure — isolate power and confirm the pump cannot start accidentally
- Close suction and discharge valves, and drain the pump completely
- Wear PPE — gloves, safety glasses, and if handling chemical fluids, a face shield
- Check MSDS sheet if the pumped fluid is hazardous or toxic
- Keep new seal kit, gaskets, O-rings, and correct tools ready before starting
- Inspect the shaft sleeve for scoring or wear marks
Quick Tip: Never reuse old O-rings or gaskets even if they look fine. A ₹200 gasket saved today can cause a ₹20,000 seal failure tomorrow.
Step-by-Step Pump Disassembly: Removing Casing and Impeller
Once safety checks are done, disassembly can begin.
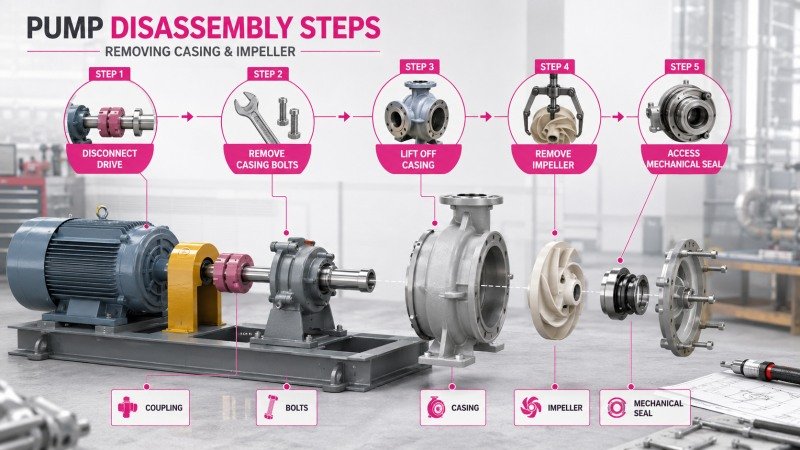
- Disconnect coupling or belt drive connecting motor and pump shaft
- Remove casing bolts in a criss-cross pattern, following correct torque specifications to avoid warping the casing
- Carefully slide out the casing, keeping the old gasket aside for reference
- Remove the impeller nut or bolt, then pull out the impeller using a proper puller — never hammer it out
- Once impeller is out, the old mechanical seal becomes accessible for removal
Take photos at each stage on your phone. It sounds basic, but it saves a lot of confusion during reassembly, especially for technicians handling multiple pump models in a day.
Installing New Mechanical Seals: Handling, Lubrication, and Positioning
This is the stage where most damage happens, so go slow here.
Cleaning the seal chamber: Wipe down the chamber bore fully. Even a small trace of old gasket material or rust can stop the new seat from sitting flush.
Handling the seal: Mechanical seals are precision parts, mostly made of carbon face and ceramic face combinations. Never touch the polished faces with bare fingers — skin oil and dust particles can create micro-scratches that lead to leakage later.
Lubrication: Apply a thin layer of compatible lubricant (glycerin or silicone-based, depending on fluid type) on the shaft sleeve and O-rings. This helps the seal slide smoothly without tearing the rubber parts.
Positioning:
| Step | Action | Why It Matters |
| 1 | Slide stationary seat into chamber, square to the shaft | Prevents wobble and uneven wear |
| 2 | Install rotating seal assembly on shaft in correct direction | Wrong orientation causes instant leakage |
| 3 | Set spring compression as per manufacturer spec (usually 3-5mm) | Ensures correct face contact pressure |
| 4 | Check seal chamber depth matches seal length | Avoids over or under compression |
For high-volume operations handling abrasive slurries or solids-laden chemicals, pumps built for large flow rates typically use a flexible seal design that allows easy upgrades from single to double mechanical seals as process demands change.
For toxic or hazardous fluids, it is better to use double mechanical seals along with a proper flush plan. This gives an extra layer of safety between the process fluid and the outside air.
Alfa Pumps Tip: For non-metallic centrifugal pumps, always confirm seal material compatibility with the pumped chemical. Non-metallic construction handles corrosive fluids well, but the seal elastomers must match too — otherwise the pump body outlasts the seal by years, which defeats the purpose.
Reassembling the Pump and Performing Critical Checks:
Reassembly is basically disassembly in reverse, but with a few extra checks along the way.
- Reinstall impeller and tighten to the specified torque, not just “hand tight plus a bit”
- Fit new casing gasket, never the old one, and torque casing bolts evenly in criss-cross sequence
- Rotate the shaft by hand before starting the motor — it should turn freely without resistance or grinding sound
- Reconnect coupling or belt, checking alignment with a dial gauge if possible
- Open suction valve first and prime the pump fully before starting — running a mechanical seal dry, even for a few seconds, can damage the faces permanently
- Start the pump briefly, check for leaks, then run for 15-20 minutes while monitoring seal chamber temperature and any drips
Safety Warning: Never run a newly installed pump unattended for the first hour. Small leaks that show up early are much cheaper to fix than a seal that fails after a week of continuous running.
Diagnosing and Resolving Common Installation Problems:
Even with careful work, issues can show up. Here are ones technicians see most often:
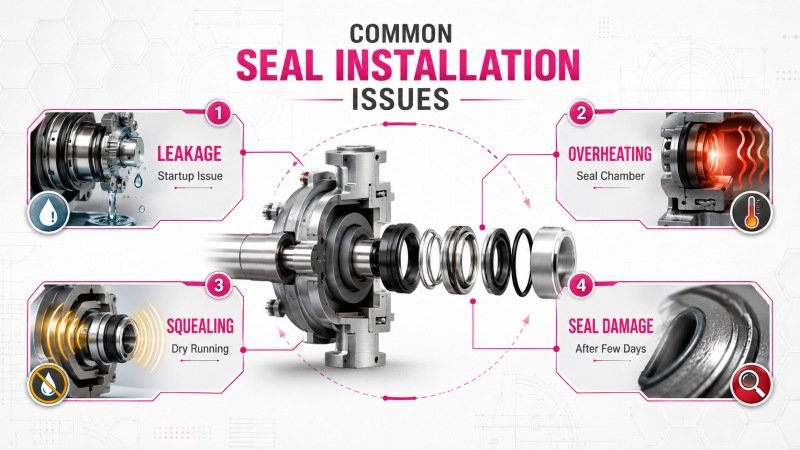
- Leakage right after startup — usually means the seal ran dry before priming, or the seat wasn’t seated square
- Excessive heat at seal chamber — spring compression may be set wrong, or flush fluid is not reaching the seal
- Squealing noise — dry running or lack of lubrication during installation
- Leakage after a few days — check for scratched seal faces from mishandling, or incompatible O-ring material reacting with the fluid
If leakage doesn’t stop after checking these points, it’s worth getting a second inspection done rather than repeating the same fix.
In applications with solids-laden or highly abrasive fluids, some facilities prefer vertical cantilever pump designs where the shaft stays completely outside the fluid path, removing the dry-run risk altogether.
Preventive Maintenance Strategies to Maximize Mechanical Seals Lifespan:
A few habits go a long way in extending seal life:
- Monitor seal chamber temperature and vibration levels monthly
- Keep flush fluid systems clean and check pressure regularly
- Avoid running pump dry, even briefly, during startup or shutdown
- Schedule seal inspection during every major pump service, not only when leakage starts
Conclusion:
Installing a mechanical seal correctly is not complicated, but it does demand patience and attention to detail at every step — from cleaning the seal chamber to torqueing the final bolt. Rushing through any single step is usually where problems begin. Following a proper checklist, using the right lubrication, and doing a careful priming and startup check can add years to your seal’s working life. For plants using non-metallic centrifugal pumps, matching seal material to the process fluid is just as important as the installation technique itself. When in doubt, Alfa Pumps’ technical team is a good resource to confirm the right seal specification for your specific application.
FAQs:
Start with LOTO safety procedure, drain the pump, and disassemble the casing and impeller carefully. Clean the seal chamber, lubricate the shaft sleeve and O-rings, then fit the stationary seat and rotating assembly in correct orientation with proper spring compression. Always prime the pump before startup to avoid dry running.
Leakage usually happens due to dry running before priming, an improperly seated seal face, or contamination in the seal chamber during fitting. Scratches on the seal face from careless handling are another common cause.
The shaft should rotate freely by hand with no grinding or resistance before starting the motor. After startup, there should be no visible leakage and seal chamber temperature should remain stable during the initial run.
A single seal has one set of sealing faces and suits standard applications, while a double seal uses two sets with a barrier fluid in between for extra protection. Double seals are preferred for toxic, hazardous, or high-pressure fluid handling.
It’s not recommended — even a seal that looks fine may have micro-scratches or worn faces that cause leakage soon after reinstallation. Fitting a new seal kit with fresh O-rings and gaskets is a safer, cost-effective choice long-term.
Running a mechanical seal dry, even briefly, generates friction and heat that can damage the seal faces permanently. Priming ensures liquid film is present between the faces from the very first rotation.

Mr. Sanket Patel is a visionary industrial leader and managing director of Alfa Pumps. He leads the company’s innovation in fluid handling solutions, focusing on chemical process pumps designed for corrosive fluids.